2. Sender, Recipient and invoice item templates
Create Sender
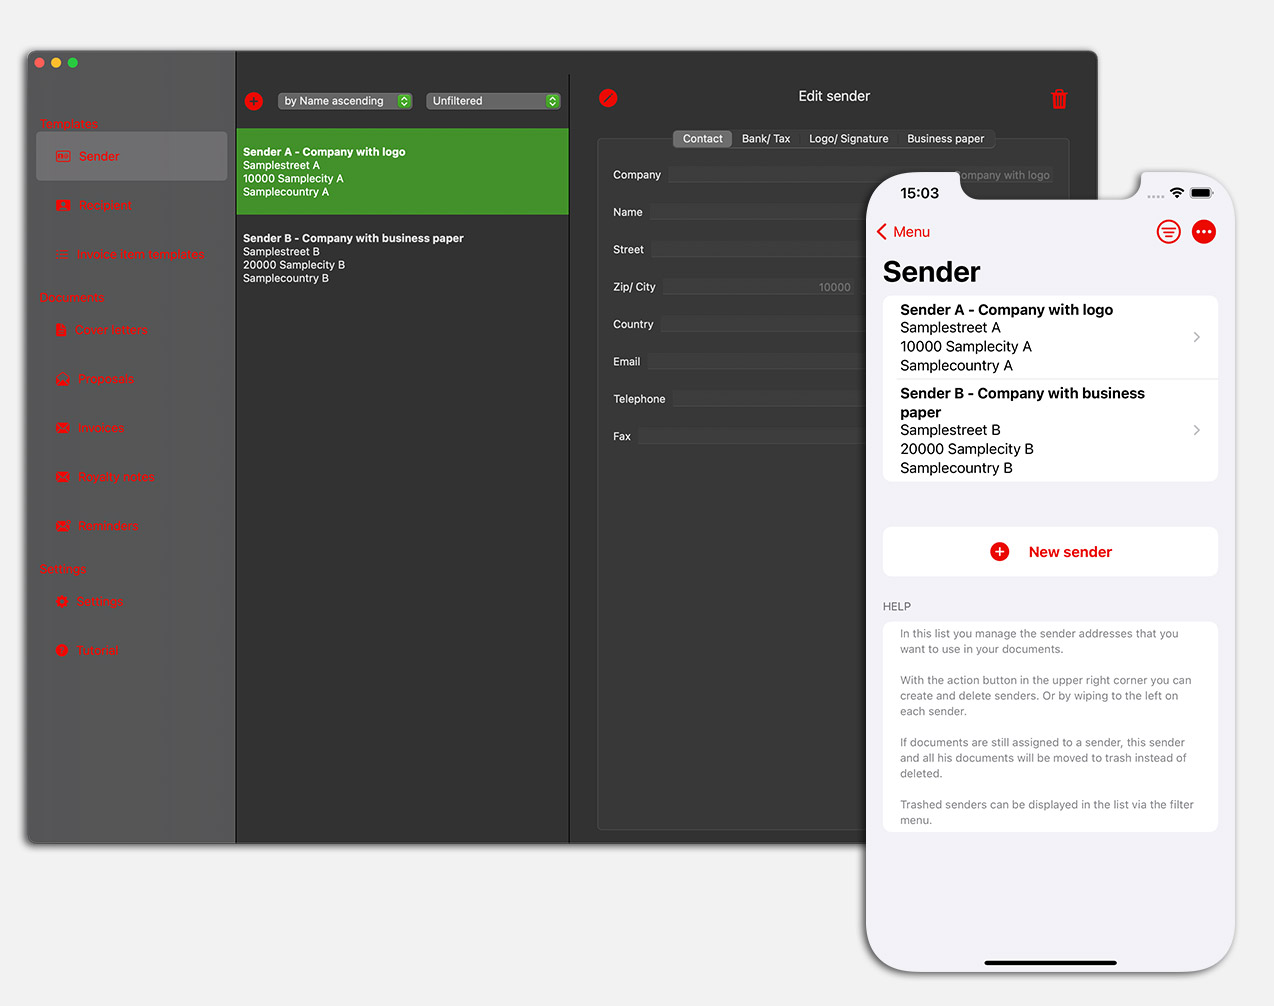
In the sender area you see the list of senders you have created
(if you want to create documents for e.g. several companies, associations, ...):
With the Plus-Button, left above the list on the Mac, below the list or right above
in the action menu under iOS, you create a new sender, which then appears in the list.
Select this newly created sender and you can edit it.
With the sort and filter selection lists above the sender list (macOS),
or the Sort/ Filter menu next to the Action menu on iOS, you can sort and filter the list of senders.
Here you will also find the Trashcan to view deleted senders or to finally
delete them.
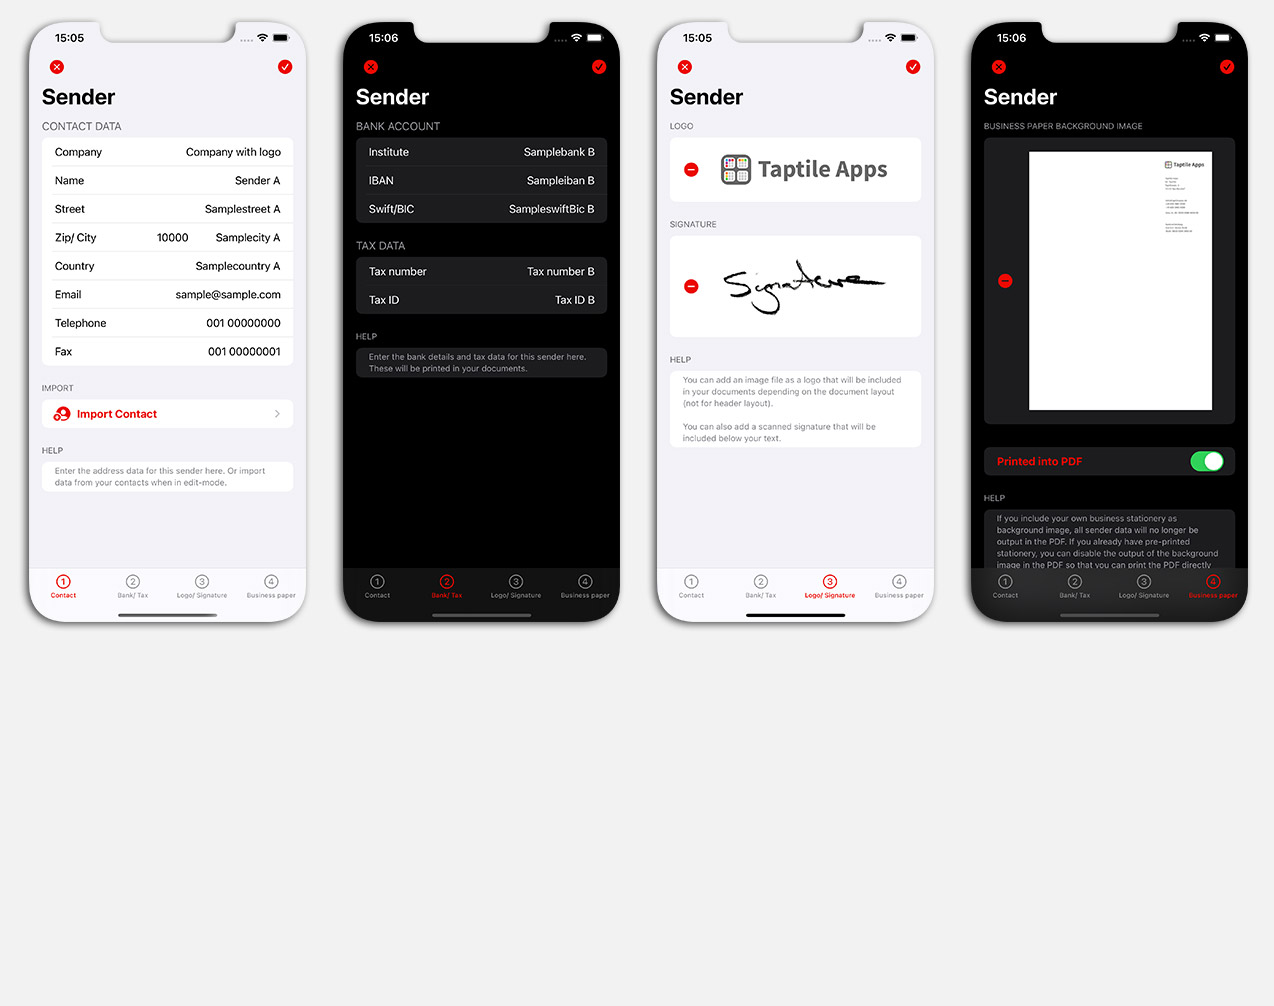
Edit Sender
You can edit a sender on four screens. You enter the contact details, the bank details, optionally your own logo or signature.
and if you like, your own stationery background image.
In the edit mode, which you activate with the pen button above, you can also import your contact data from the contacts on your device.
All the data you enter will be printed on your documents. For example, if you do not want to print a fax number, leave it blank.
With the tax data usually only one of both is necessary: If you have a sales tax ID, enter it. Otherwise, enter your tax number.
If you integrate a logo, it will be integrated at different positions depending on the layout. If you want to print the logo further to the left or right,
add a white (or better transparent) area in your logo image file.
A Caption is always output below the text.
If you include a background stationery, NO sender data will be output, because we assume that you have entered ALL necessary data in this
image file!
If you want the image file to be included and displayed in the generated PDF, activate the check box! Do you want to print the generated PDF on a
pre-printed paper, you can also hide the background image in the PDF. Then you can print the PDF directly on your pre-printed business paper.
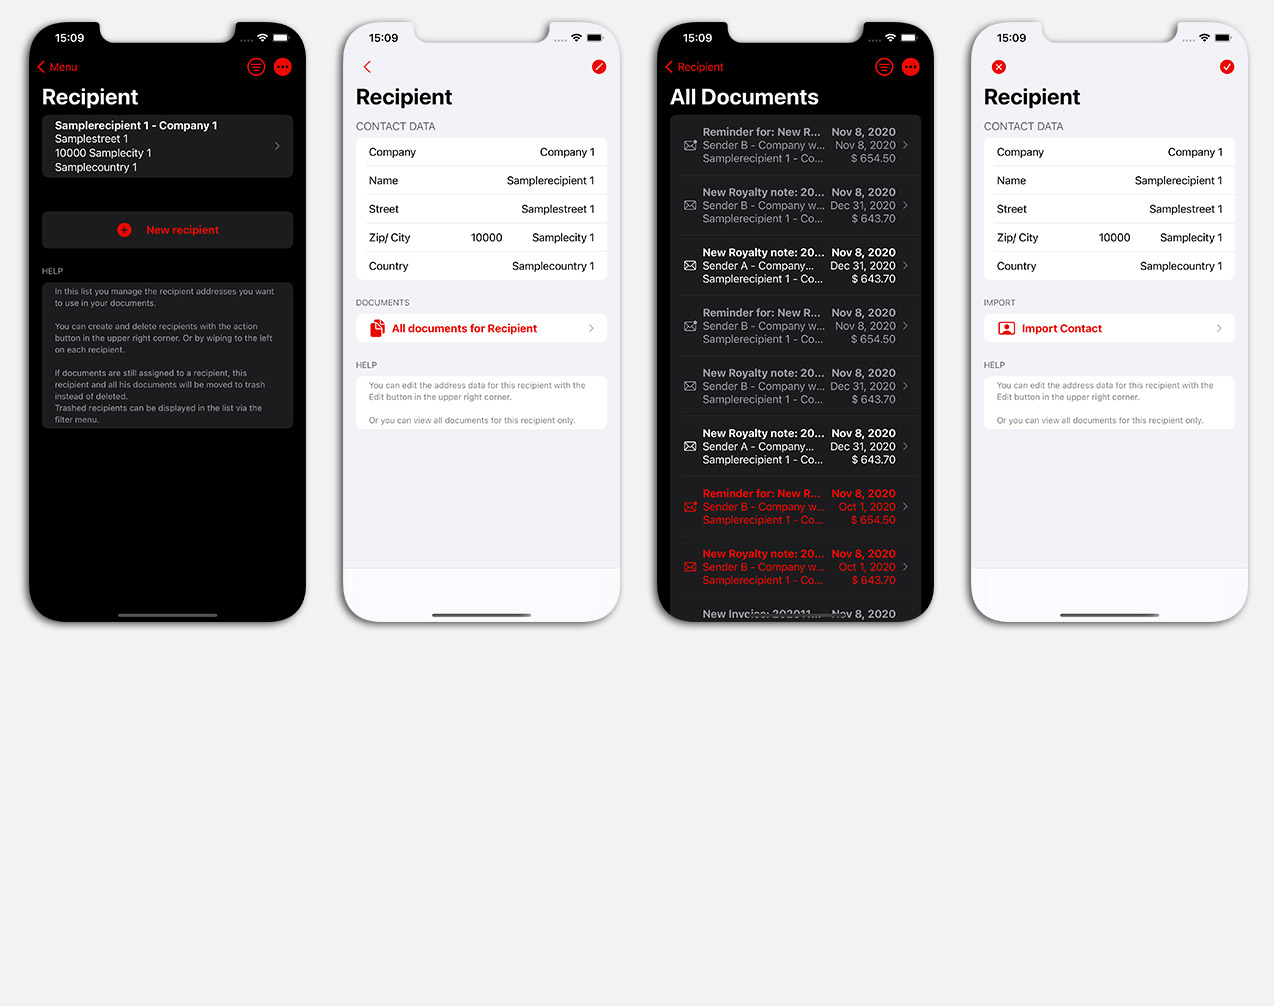
Create and Edit recipients
A recipient is created and edited like a sender. The recipient only needs
less data.
There is a special feature for the recipient: You can view ALL documents for this recipient in
of a list. This list can be sorted and filtered like all other lists.
If you are in edit mode, you can also import the contact data for a recipient.
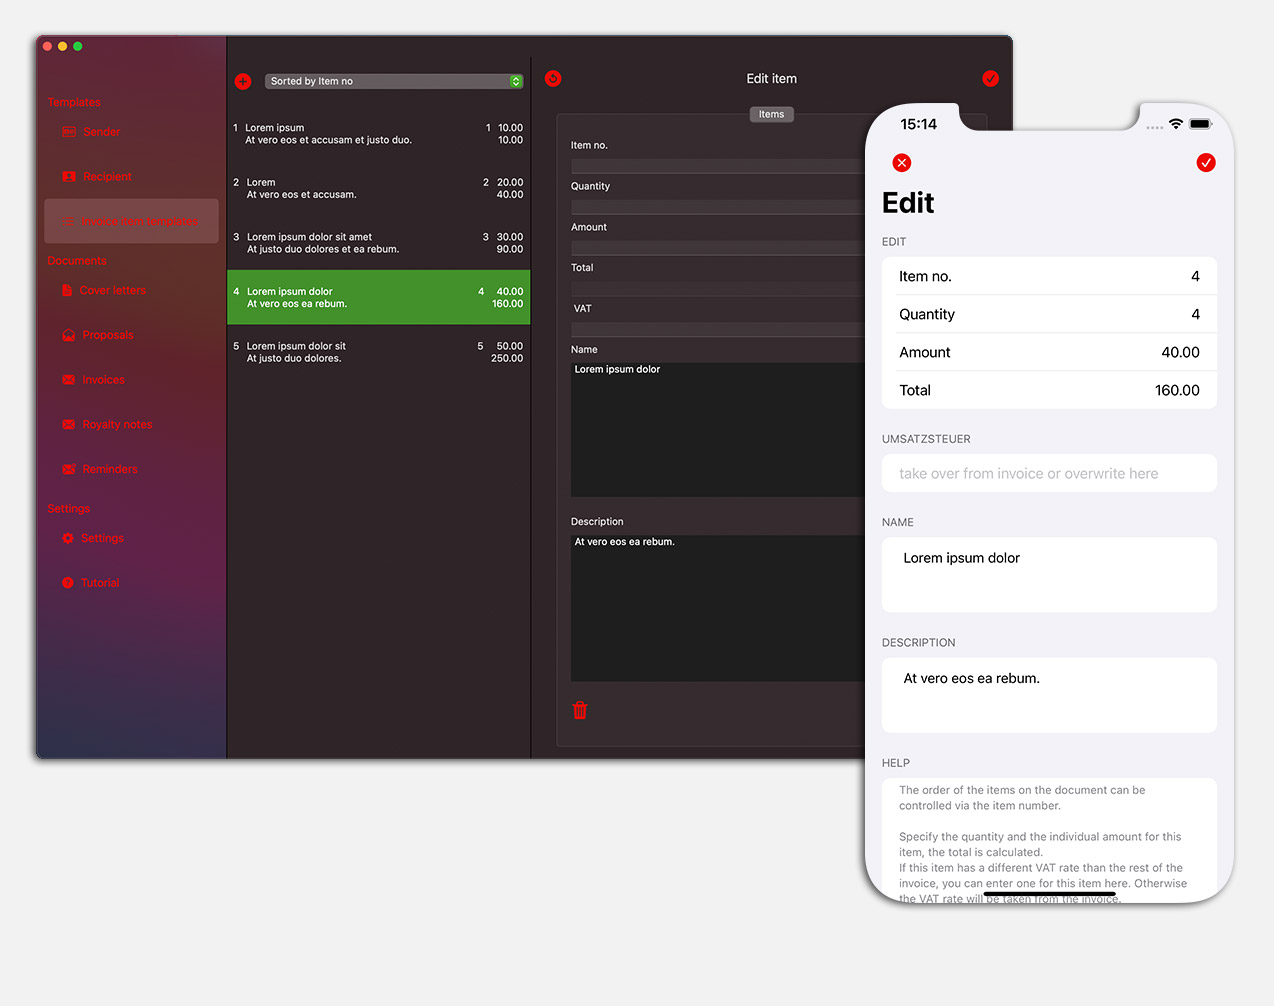
Invoice item templates
Invoice items are created with every invoice document. However, if you need very specific
Invoice items again and again, you can create templates here.
You can then select these from a list when creating the invoice items in a document.
An invoice item template has the same details as a normal invoice item.
- the item number serves exclusively for sorting the items in the list
- from number and amount the totalbr /> is calculated automatically
- You can assign a separate VAT rate to this item if it differs from the one in the invoice.
If an item does not have its own VAT rate, the rate of the invoice will be used!
- With Name and description you can explain this item in more detail